How to Download Nude Mods for Skyrim Special Edition
I am a huge fan of "The Elder Scrolls" series as well as all of the other great Bethesda titles.

"The Elder Scrolls V: Skyrim" becomes a vibrant and beautiful game with mods. This screenshot is courtesy of the RealVision ENB mod page on Skyrim Nexus.
In game Skyrim screenshots courtesy of Zenimax and Bethesda.
How to Install Skyrim Mods
Skyrim is the fifth game of my favorite series, The Elder Scrolls. In this article, I am going to walk through the manual installation of mods. Mods allow you to enhance the original game, fix bugs, add new content, and upgrade graphics. You can add landmasses or quests—in fact, pretty much anything you could possibly think of can be added, changed, or tweaked using mods.
Manually Installing Mods
Manually installing mods gives you a number of advantages over using Mod Management tools:
- Using my system, it is more accurate
- You can install parts of mods rather than the entire mod (you may for example, really like the iron armour from an armour replacement mod but not like the rest)
- You can pick and choose what you use from mods, installing just the parts you want to use
- You become more familiar with how mods work by installing them manually
The best place to find mods is the Skyrim Nexus website which can be found on Nexus. A good place to start is the Top Files section, which can be found in the sub-menu of the Files category. It will give you an idea of what is popular and also show you some of the best mods made.
Step 1. Prepare Your Mods for Installation
Before you install mods, it is a good idea to organize the mods that you have and any that you download. This is true whether you use Mod Management tools or choose to install your mods manually.
- Ensure that the mods are renamed if the original zip file has a name that doesn't match the mod itself. So for example, Sounds of Skyrim has patches for popular mods. The zip file is called Compatibility Patches-20193-1-02 so I renamed it Sounds of Skyrim – Compatibility patches. Otherwise, in a few months' time, you may have no idea what the mod is.
- Next, create a folder and copy all your correctly named mods into it. Also, create a folder called Installed and a folder called New. We will use the folders during the mod installation process.
- If you are using Skyrim Nexus, it is also a good idea to mirror their categories to make mods easier to sort and also to find
- Finally, and most importantly, copy your entire Skyrim folder so that you have a backup. That way if something goes wrong you can roll back without re-installing the game.
Step 2. Check the Status of Your Mods
Now that we have all our mods appropriately named and tidied into one folder, we need to check for any conflicts, dependencies, or patches for our mods. Again, this is a step that you should perform for all mods regardless of the installation method. First:
- On Skyrim Nexus, read the mod's description (Desc) tab thoroughly for any installation advice from the modder.
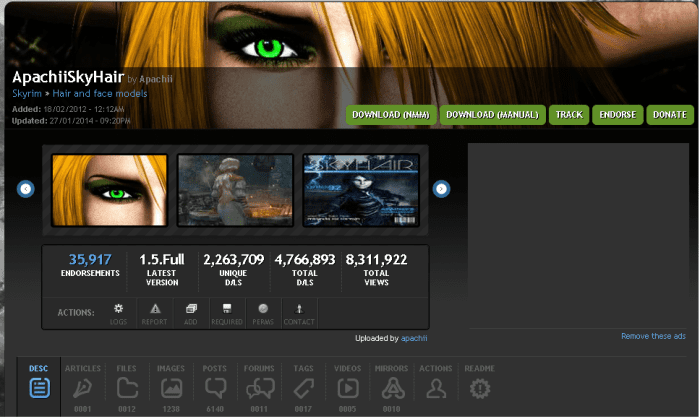
The Description tab for a mod hosted by Skyrim Nexus is a very important source of information about patches and conflicts. You can also other see other mods by the same author.
http://www.nexusmods.com/skyrim/
- Next, on the Files tab, check for any patches that the modder has created to allow the mod to run well alongside other mods that may conflict with it.
- You can also message the mod creator and also talk to other gamers playing Skyrim and discuss or ask questions about the mod on the Posts tab.
- Finally, check the readme files that come with the mod, looking for conflicts, installation recommendations and also where in the load order the mod should go.
It is important to always read the instructions closely. Even mods that you wouldn't expect to cause issues can and will cause problems, including the dreaded Crash to Desktop (CTD).
An example is ApachiiSkyHair by the talented modder, Apachii. This mod can cause CTDs when you change hair, sex, or race when selecting your character at the beginning of the game. The modder on the Description tab in Skyrim Nexus tells you exactly how to fix this problem (install Show Race Menu Options by MojoDaJojo and voila, no more issues with this mod).
Step 3. Manually Install Your Skyrim Mods
Installing mods manually once you have checked the installation instructions and downloaded any patches is fairly straightforward. Even if you use a Mod Manager, installing mods manually gives you a greater understanding of how the files fit together and what they do.
- Cut and Paste the zip file into the New folder we created above.
- Open the zip file of the mod you are about to install (I have expanded the folders so you can see the folders in the mod structure below).
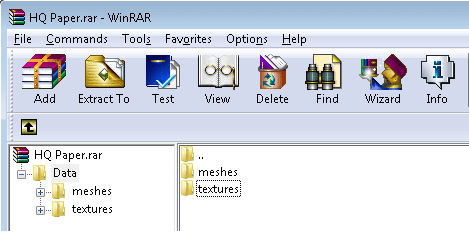
Example of how the files and folders that make up a Skyrim mod are organised.
http://robbiecwilson.hubpages.com/
- Now open your Skyrim game folder and look at the Data folder.
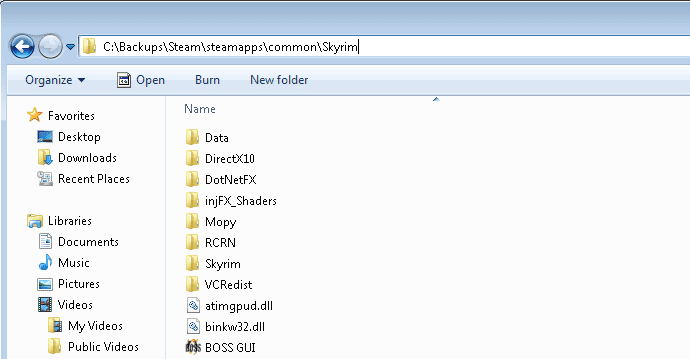
The folder structure inside your Skyrim game folder.
http://robbiecwilson.hubpages.com/
- Collapse the tree view and drag the folder (or folders) below the Data folder from the zip to Data folder in your game installation folder.
Read More From Levelskip
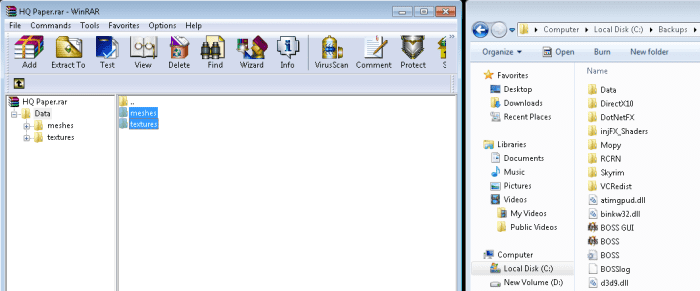
How to manually copy a mod to your Skyrim game folder.
http://robbiecwilson.hubpages.com/
Typically, you will copy one or all of three folders:
- Textures: Add detail and surface texture to all objects you see in-game.
- Meshes: Control the shape of all the objects in-game.
- Scripts: Changes how things behave in the game.
There may also be other files .bsa, .esp in the Data folder. Copy all of these to your Data folder. Windows may ask you to overwrite files in the game directory, typically you would say yes, unless there is a reason that you don't want a specific file overwritten (for example, overwrite a larger (and more detailed) texture file with a smaller one).
Once you have installed the mod, continue to install mods until you have installed five to ten mods (depending on the type of mod). If you are installing texture replacers or mods that add small amounts of new content such as new weapons or armor, you can install more mods at once. Install fewer if you see significant changes that inhibit your gameplay.
Step 4. Test Your Installed Mods
The next and most important phase is testing. You need to make sure that the mods you have just added have not introduced bugs, crashes or other problems. The reason that you install them in small batches is that this way it is easier to determine which mod is causing the problem. Look at my load order below—imagine if I had installed them all at once and then I found there was a problem! I would never be able to figure out which mod was causing it.
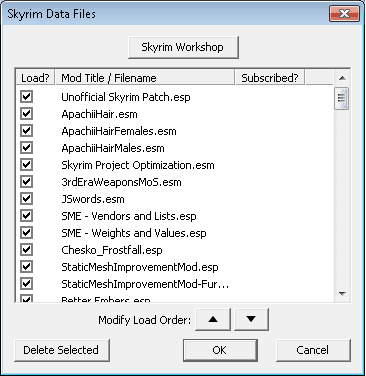
An example of a "Skyrim" mod load order.
http://robbiecwilson.hubpages.com/
If I only installed five to ten mods, it is much simpler to find that out. If you do introduce a bug to your game, deselect all the mods you just added and add them back one at a time (testing the game before adding another mod) until you come to the one that causes the issue.
Important: If you find a mod that causes issues, immediately install it and move the mod to another folder so you don't accidentally install it again later on.
Testing itself is simple enough.
First, load up BOSS. If you don't have this tool installed or are unsure how to use it, check out my article that introduces this excellent tool.
BOSS does a number of things that are crucial to keeping your game stable.
- It checks mods for any missing dependencies.
- BOSS ensures that you don't have the problems with the mods you have installed.
- You will be advised if you need to clean any mods using TES5edit (also introduced in my hub on BOSS).
Most importantly, it fixes your load order to ensure that the mods are loaded in the optimal order
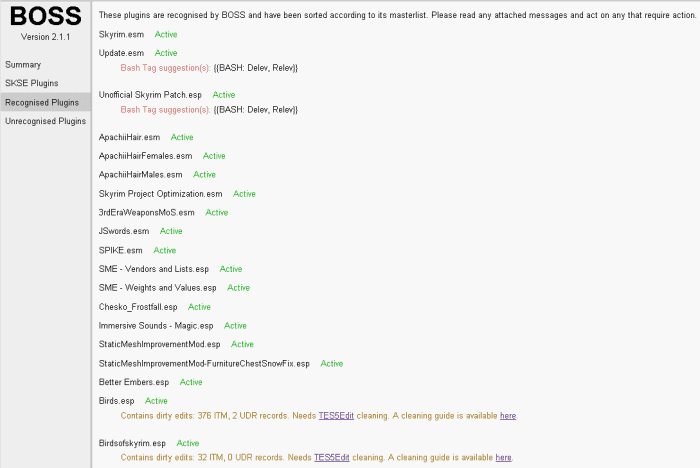
BOSS is an excellent tool that helps identify problems with Skyrim mods and also sets up a correct load order for you
http://robbiecwilson.hubpages.com/
Most game crashes occur on loading new areas into the game (or when the game starts). So to test this, start a new game in a city and go to some shops and fast travel a few times. Also, check out how the mods you just installed look in-game. If you just replaced all the armour sets in Skyrim, go to a place with lots of soldiers and check out how the armour looks. If you are happy and the game is stable it is time to install some more mods!
Before you do; some final steps:
- First, empty the New folder you created moving the mods into the Installed folder.
- Now, copy the Skyrim game folder so that you have a backup of your current stable game.
How to Partially Install Skyrim Mods
Suppose you are surfing a website looking at mods and you see a screenshot of a particularly cool object that you really want to see in your game. The trouble is, the rest of the objects included in the mod you really don't like. If you are using a Mod Manager, this is a problem as you can only install the whole mod. You could try to remove the parts that you don't like, but this could cause instability or game crashes.
To manually install specific parts of a mod, you need to identify where they are in the mod itself. To do this:
- Download XnView from www.xnview.com.
- Install using the simple installer.
- Click OK on the Configuration Menu (below).
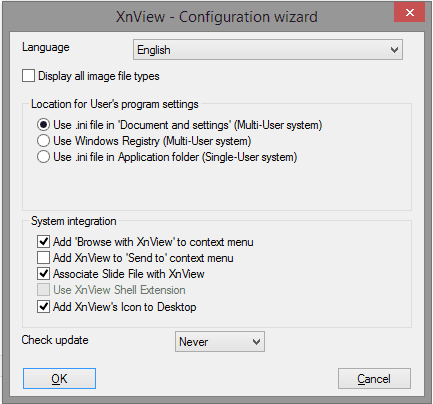
The initial configuration screen for XnView, click OK to accept the default values.
http://robbiecwilson.hubpages.com/
The main application window looks quite complicated, but never fear, we are not going to use any of the buttons or options
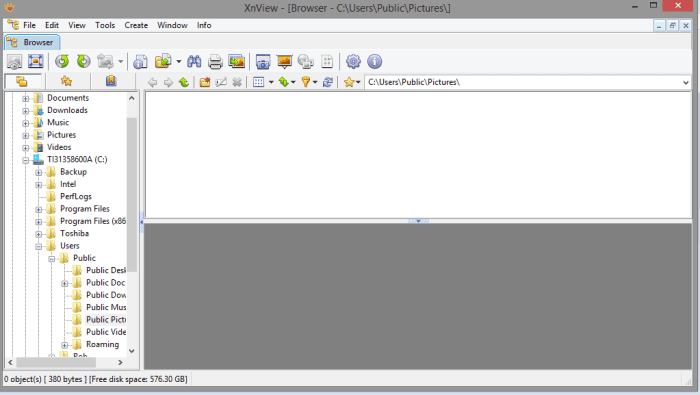
The main XnView interface.
http://robbiecwilson.hubpages.com/
Before beginning, there are a couple of limitations with XnView:
- First, the mod needs to be extracted (use WinZip or WinRar).
- Second, XnView cannot look inside .bsa or .esp files (this is not an issue as it is not recommended to split these).
Click File and then Open and browse to the location of the mod. Choose the Textures folder you are interested in, select all the textures and click OK
XnView will load each texture and display it on screen
To view them, you can either click through them, or click on the Browser button on the left hand end of the toolbar to see them all in tiles
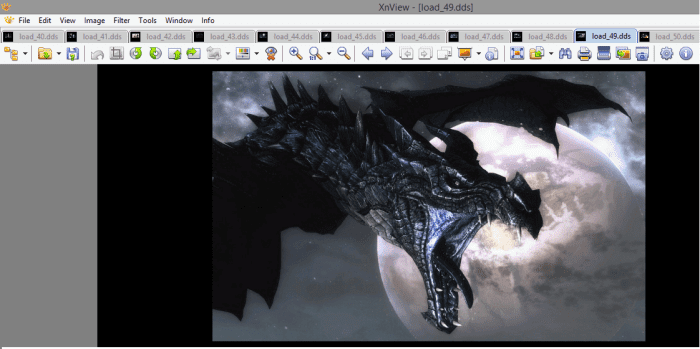
XnView showing the contents of a texture file in "Skyrim" from the mod VictoriaG Load Screens.
VictoriaG Load Screens a Skyrim mod
When you click the Browser button, you see all the files in the directory as small tiled icons (below). You can see a small preview in the photo below.
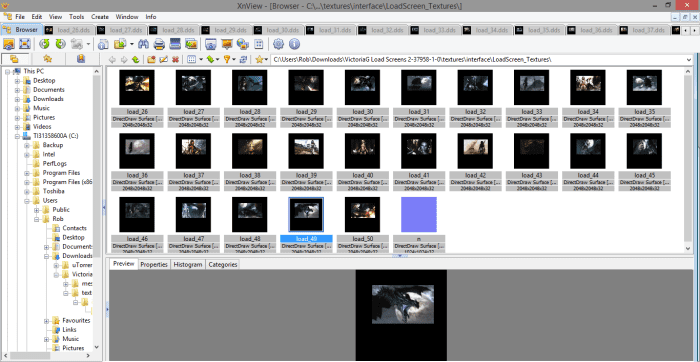
XnView showing all the textures in a particular folder to allow you to identify specific textures from a "Skyrim" mod.
VictoriaG Load Screens a Skyrim mod showing on XnView
Now I know the name of the texture file that corresponds to the plant I like (load_49), I can copy this from the mod into my Skyrim textures folder, enabling this beautiful loading screen to be seen in-game.
Note: Pay particular attention to the folder structure of the mod. You can see from the screenshot below that the Load Screen textures from the VictoriaG Load Screens Skyrim mod go into the folder:
/Textures/interface\LoadScreen_Textures
So ensure that you mirror the folder structure in your Skyrim game folder to ensure that they install correctly. If you are installing new content such as this mod, install any .esp files contained in the mod folder.
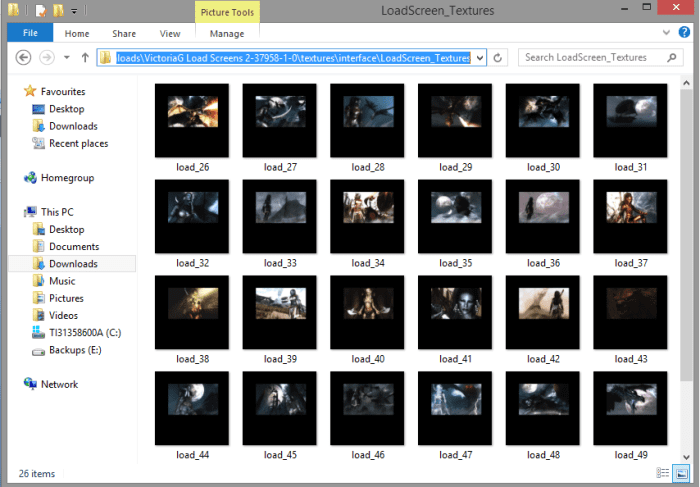
Always check the folder structure when installing new mods in "Skyrim."
http://robbiecwilson.hubpages.com/
Enjoy Your Mods!
Mods are synonymous with the Elder Scrolls series. The best decision that Bethesda made when making the Elder Scrolls III: Morrowind was including the Construction Set which was used to create the game itself. This gave modders unparalleled access to the game and allowed them to make mods to change literally anything in-game, as well as adding tons and tons of new content.
In this article, I outlined the process of installing mods manually. We covered:
- Preparing mods for installation.
- Checking the readme documents and the Skyrim Nexus site for information on load order advice, installation instructions, dependencies and also mod conflicts.
- We then looked at how best to manually install mods.
- Then we examined mod testing.
- Finally, we looked at partially installing mods using XnView to identify individual textures.
Following my system, you will be able to install all the mods you like (I currently run 250+) and the game should be stable and perform well. Of course, manually installing mods is not for everyone. In this article, I reviewed two excellent Mod Organiser tools, Nexus Mod Manager (designed for beginners to modding with a simple to use interface and one-click mod installation) and Mod Organiser (a more advanced tool with features such as profiles and a more granular installation process).
Many thanks for reading. I do hope that you have found this article useful and informative, and that you are enjoying your heavily modded, but stable, Skyrim game!
How to Download Nude Mods for Skyrim Special Edition
Source: https://levelskip.com/how-to/Beginners-Guide-on-how-to-manually-install-and-use-Elderscrolls-V-Skyrim-mods-downloaded-from-Nexus-or-other-websites
0 Response to "How to Download Nude Mods for Skyrim Special Edition"
Post a Comment